CGroup Experiments
URL: https://kernel.googlesource.com/pub/scm/linux/kernel/git/glommer/memcg/+/cpu_stat/Documentation/cgroups
1. CGroup Installation
The first step, on Ubuntu, is to install the cgroups packages.
1 | sudo apt-get install cgroup-tools cgroup-bin cgroup-lite libcgroup1 cgroupfs-mount |
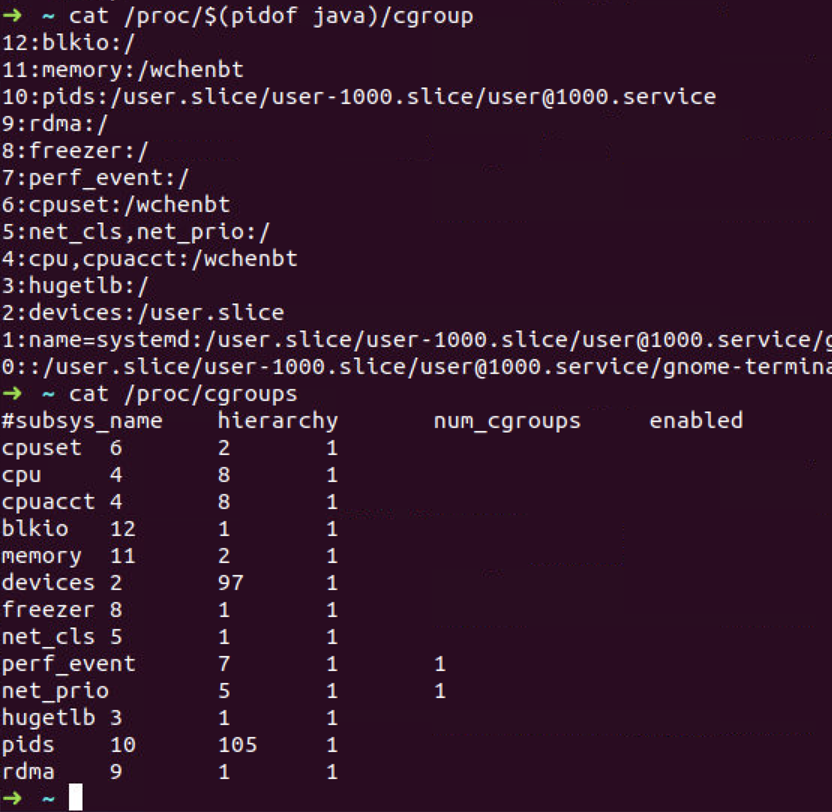
Several files are created at the same time.
/sys/fs/cgrouphas a bunch of folders in a sort of virtual filesystem that "represents" cgroup./etc/init/cgroup-lite.confcreates the /sys/fs/cgroup directory/proc/cgroupsspecifies what groups cgroup-lite should create.
- By accessing the cgroup filesystem directly.
- Using the cgm client (part of the cgmanager).
- Via cgcreate, cgexec and cgclassify (part of cgroup-tools).
- Via cgconfig.conf and cgrules.conf (also part of cgroup-tools).
1 | # /etc/init/cgroup-lite.conf |
2. CPUSet Usage Limitation
Now the environment and tools are ready, we will define some roles in
/etc/cgconfig.conf
1 | group wchenbt { |
We will associate these “roles” and the applications in
/etc/cgrules.conf
1 | # <user:process> <subsystems> <group> |
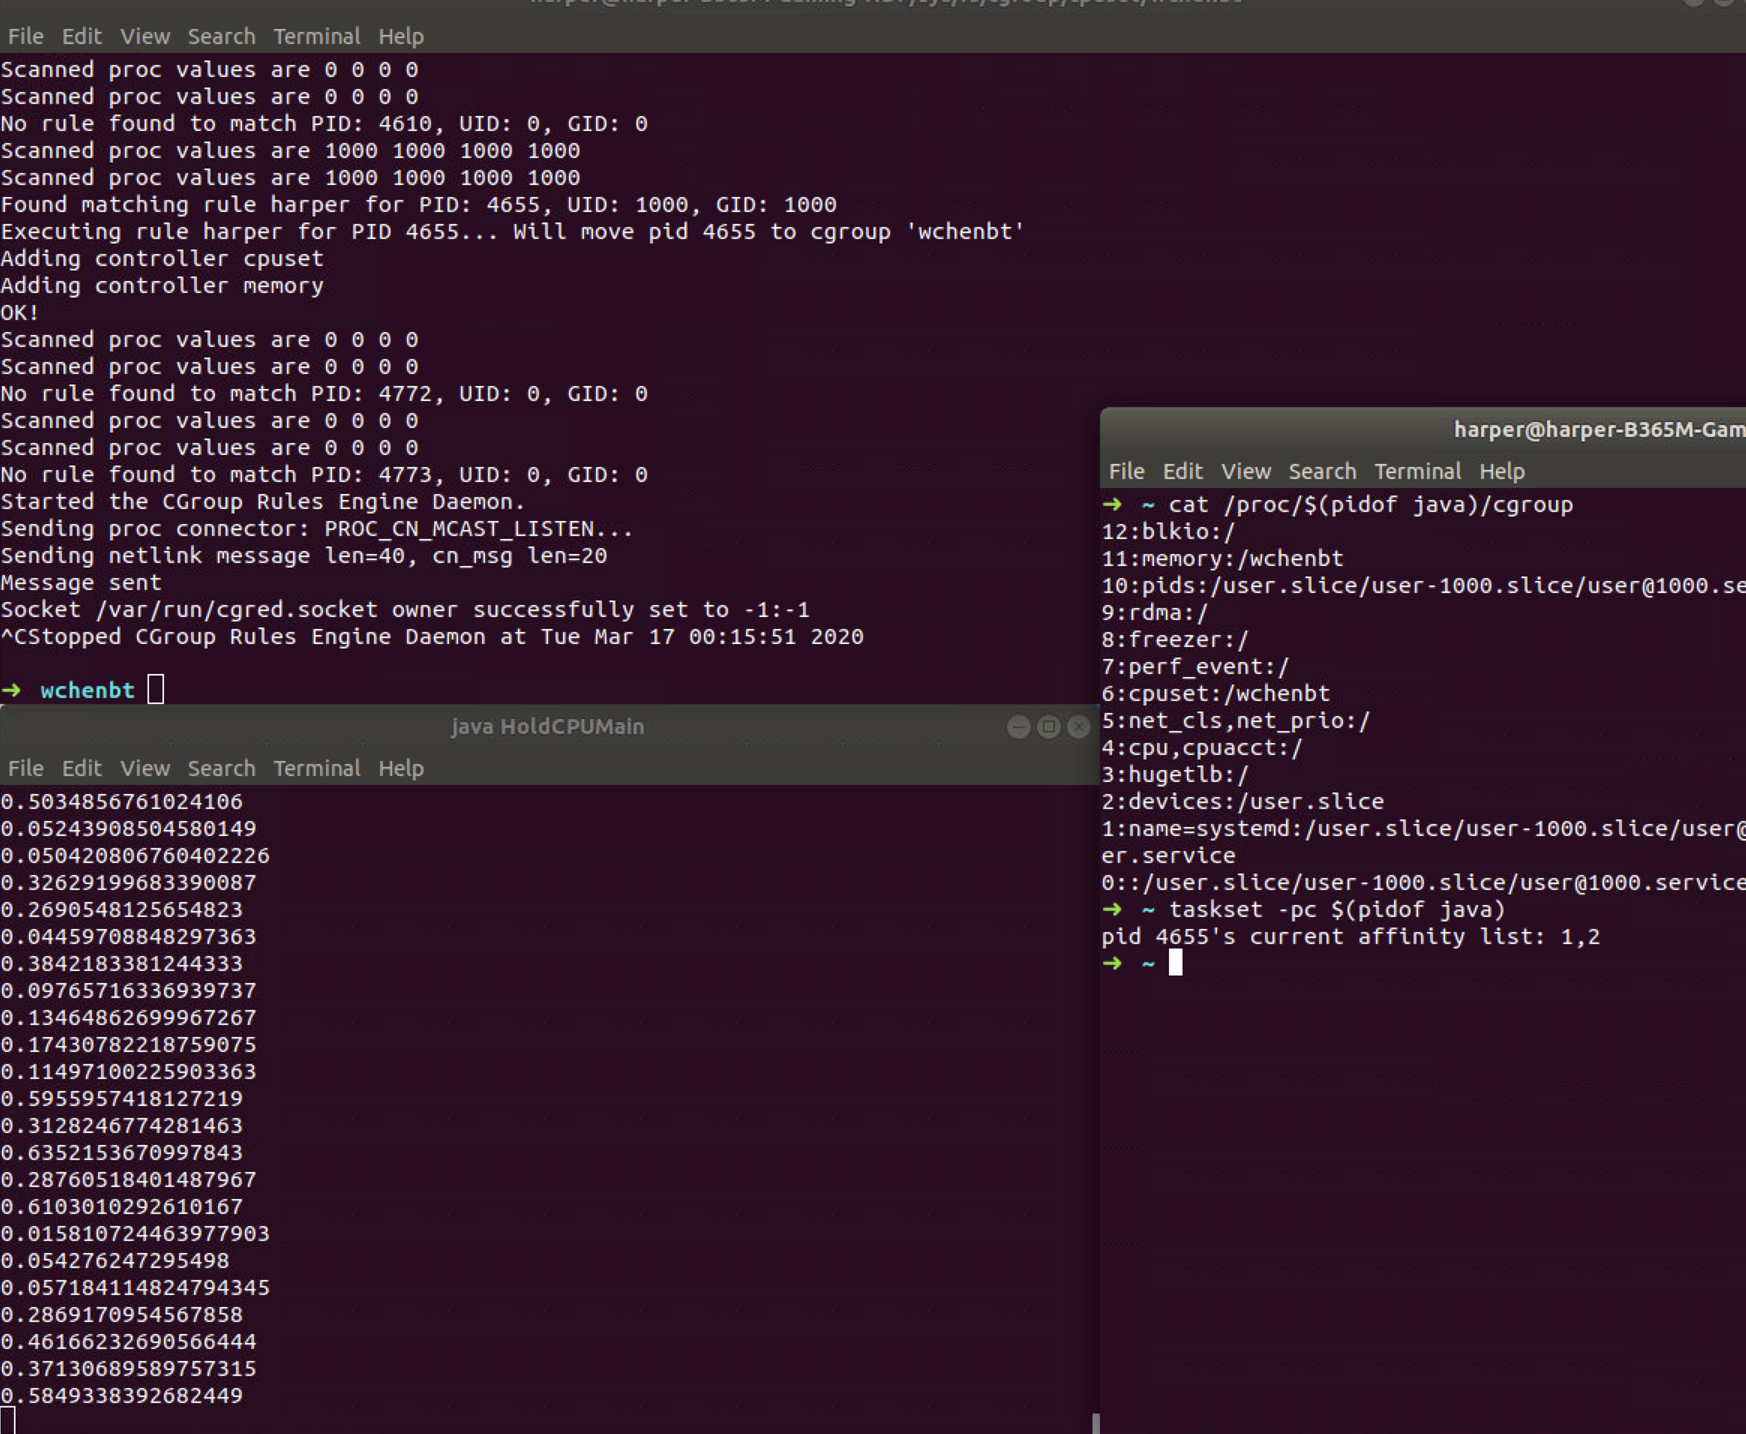
This will limit the process java of user harper to CPU Core 1, 2 and 1G of memory.
1 | sudo vim /etc/cgconfig.conf |
Based on the roles, we can check the debug information of cgrulesengd
and also the cgroup information of java. The output of taskset shows
that we have successfully setup the roles.

3. CPU Usgae Limitation
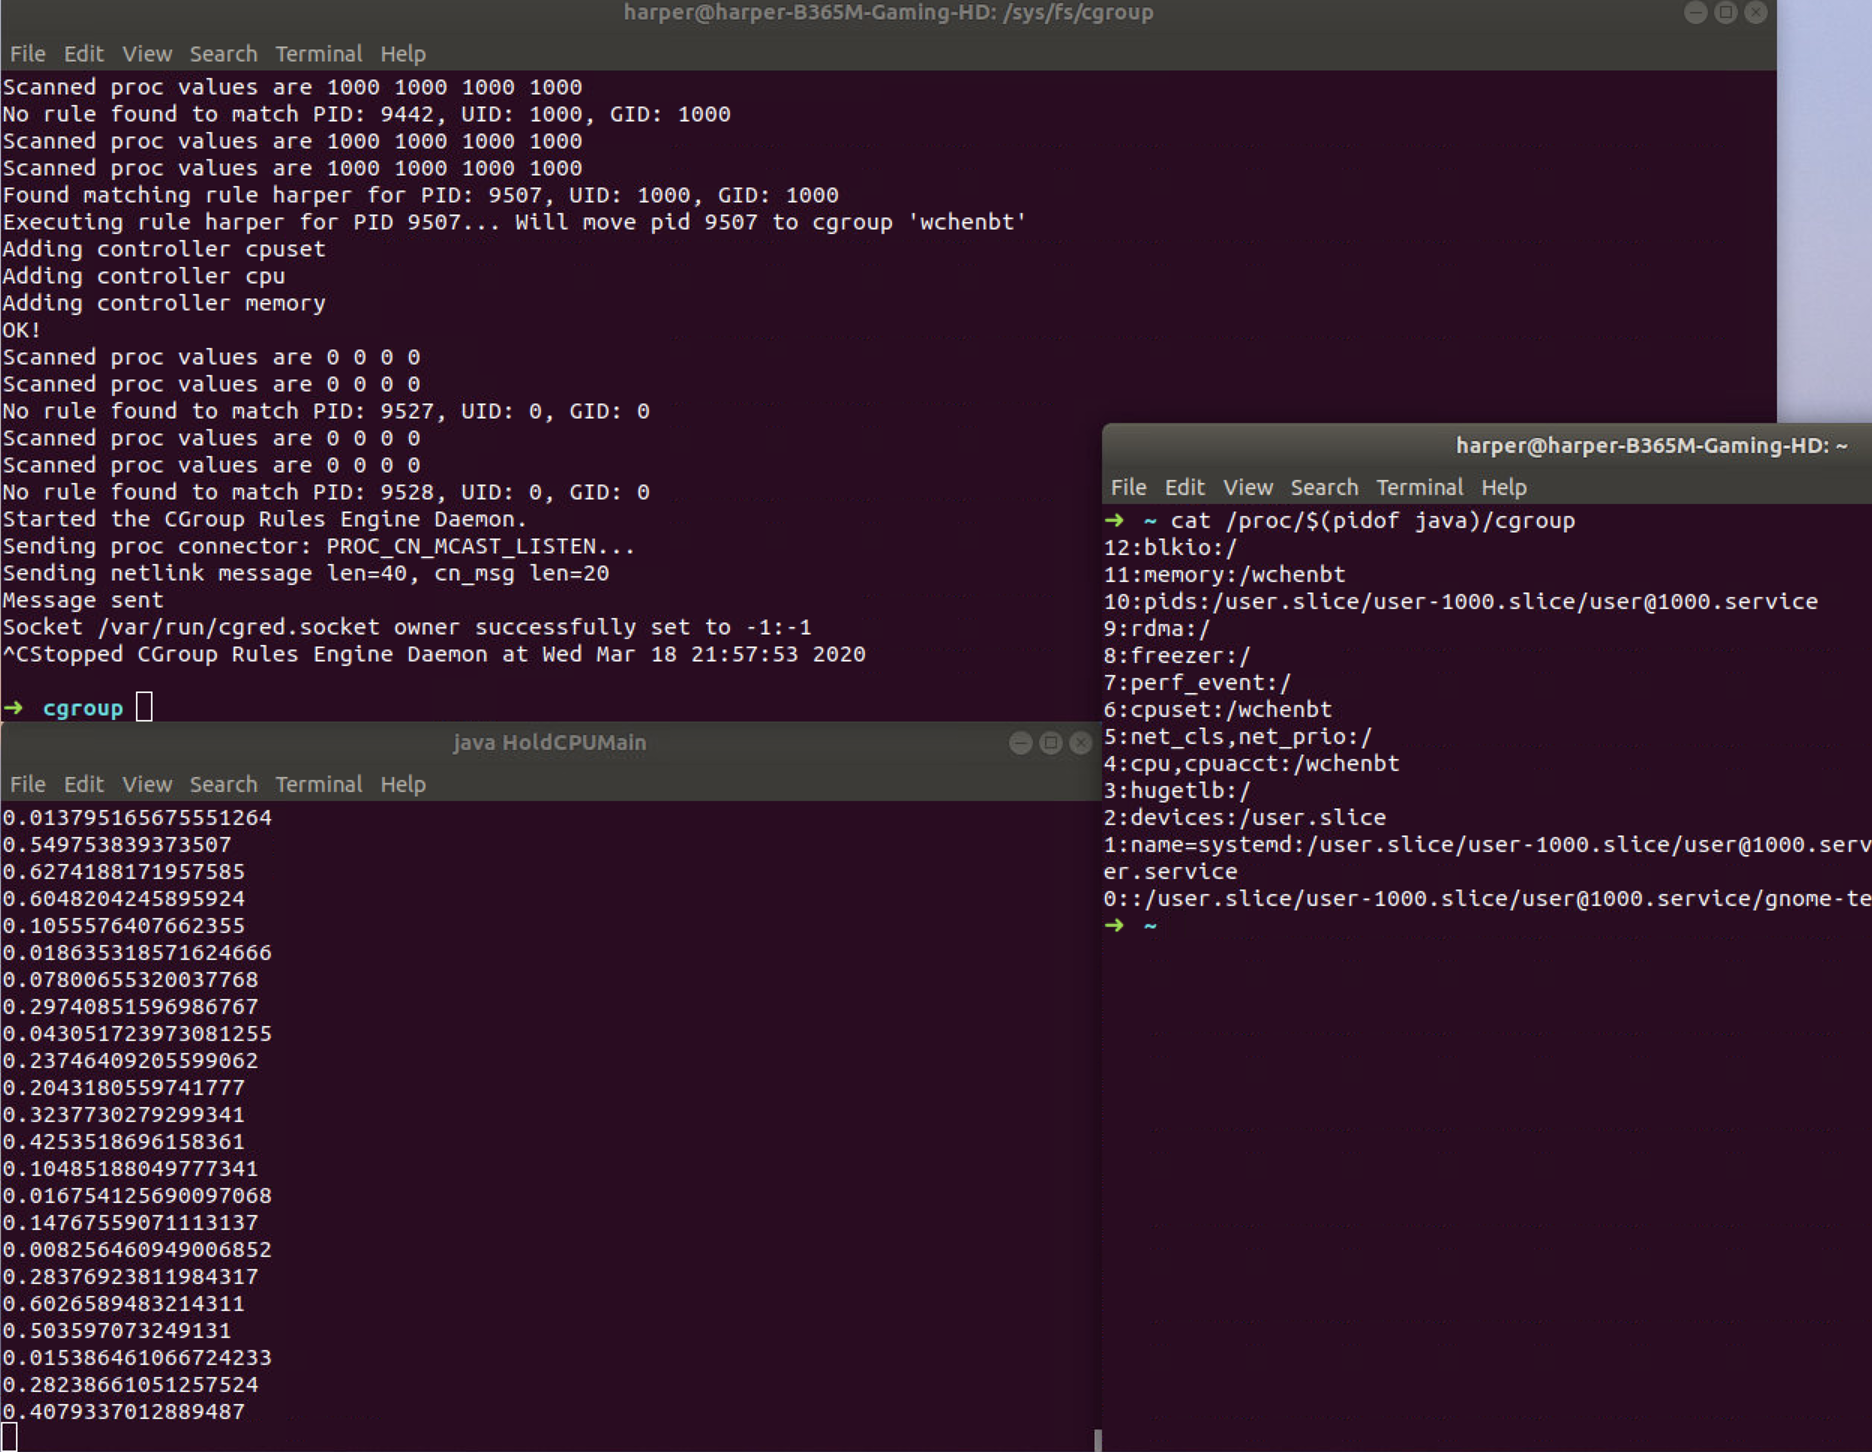
1 | group wchenbt { |
- cpu.shares: The weight of each group living in the same hierarchy, that translates into the amount of CPU it is expected to get. Upon cgroup creation, each group gets assigned a default of 1024. The percentage of CPU assigned to the cgroup is the value of shares divided by the sum of all shares in all cgroups in the same level.
- cpu.cfs_period_us: The duration in microseconds of each scheduler period, for bandwidth decisions. This defaults to 100000us or 100ms.
- cpu.cfs_quota_us: The maximum time in microseconds during each
cfs_period_us in for the current group will be allowed to run. For
instance, if it is set to half of cpu_period_us, the cgroup will only be
able to peak run for 50 % of the time. One should note that this
represents aggregate time over all CPUs in the system. Therefore, in
order to allow full usage of two CPUs, for instance, one should set this
value to twice the value of cfs_period_us.
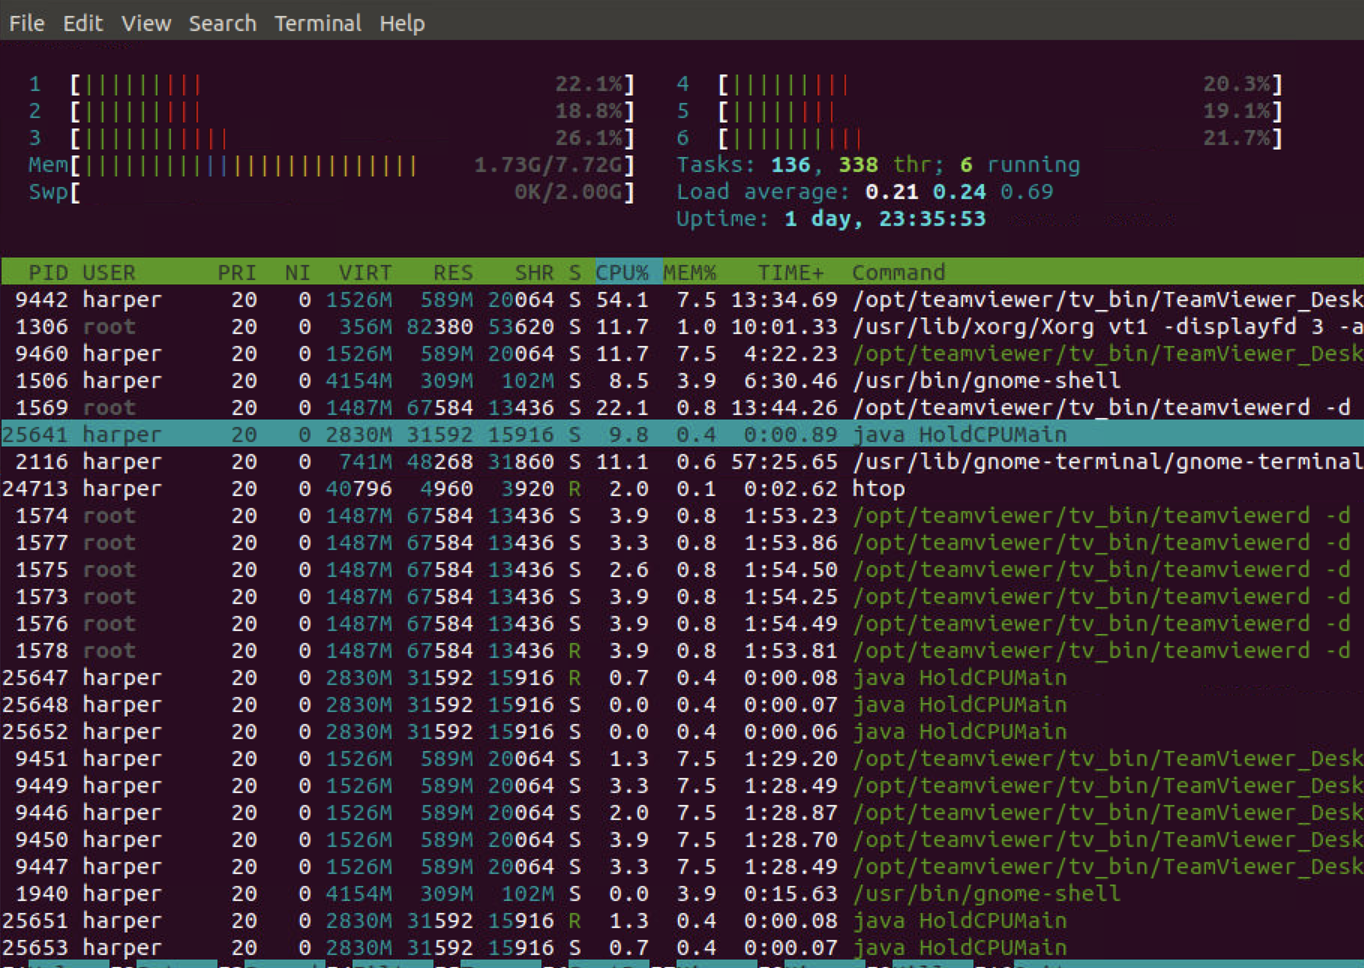
We use htop to check the cpu usage which is lower than 10%.
4. Memory Usage Limitation
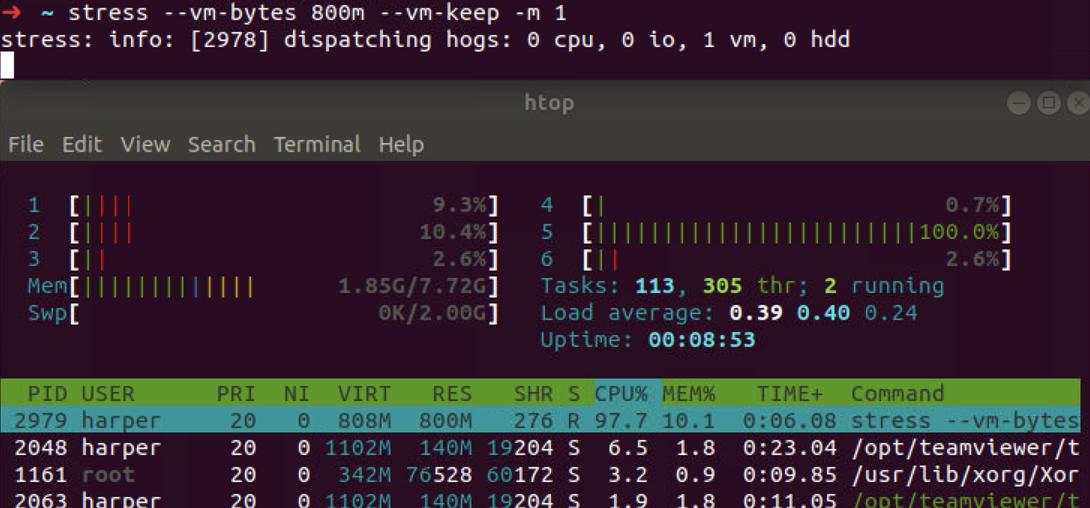
When not configure the memory limitation, we use stress process and check the memory usage is around 10%
1 | # Stress https://www.cnblogs.com/sparkdev/p/10354947.html |
1 | # user su |
5. CGCreate
1 | cgcreate -a root -t harper -g cpu,memory:test |
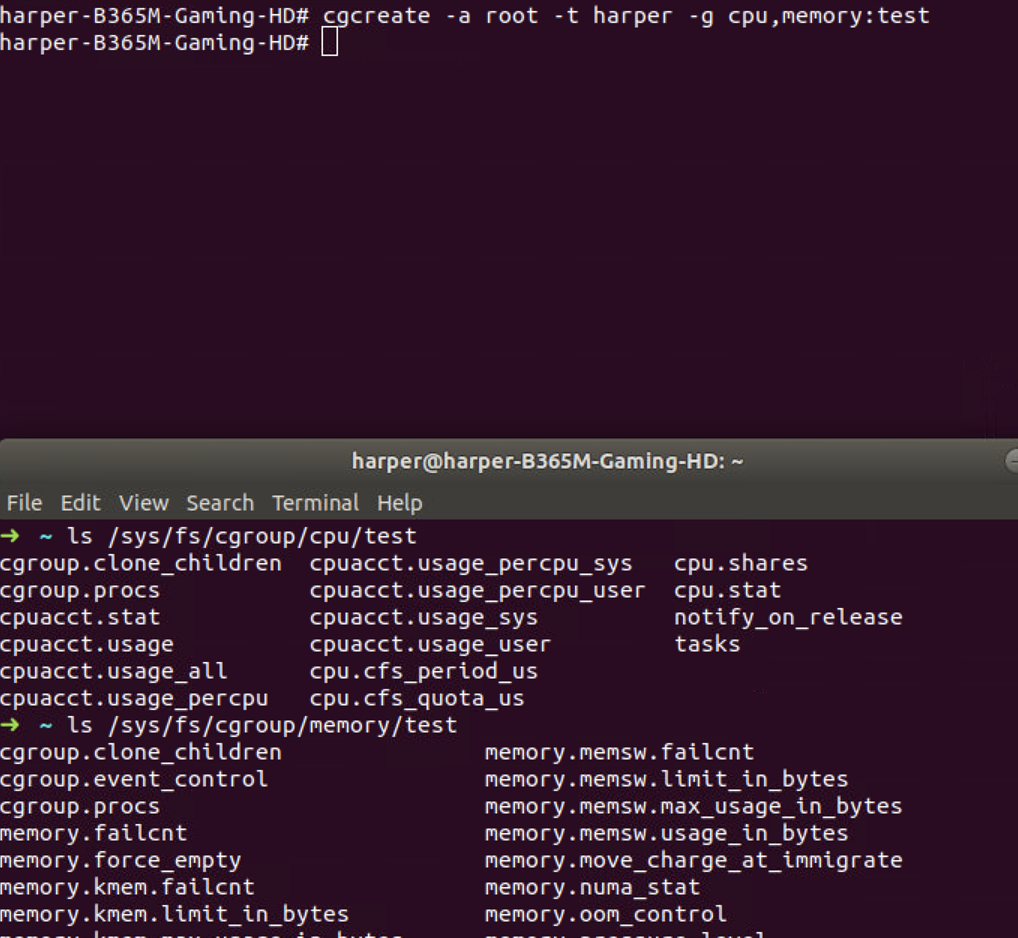
You'll get 1024 for your cpu.shares (the maximum & default) and a
huge number for your memory usage limit in bytes.

6. Data Synchronization
https://medium.com/@asishrs/docker-limit-resource-utilization-using-cgroup-parent-72a646651f9d https://andrestc.com/post/cgroups-io/
6.1 CGroupv1
The script /etc/init/cgroup-lite.conf will automatically
mount cgroup filesystem when rebooting.
1 | # /etc/init/cgroup-lite.conf |
Also, we need add the following to /etc/default/grub and
update
1 | GRUB_CMDLINE_LINUX_DEFAULT="quiet cgroup_enable=memory swapaccount=1" |
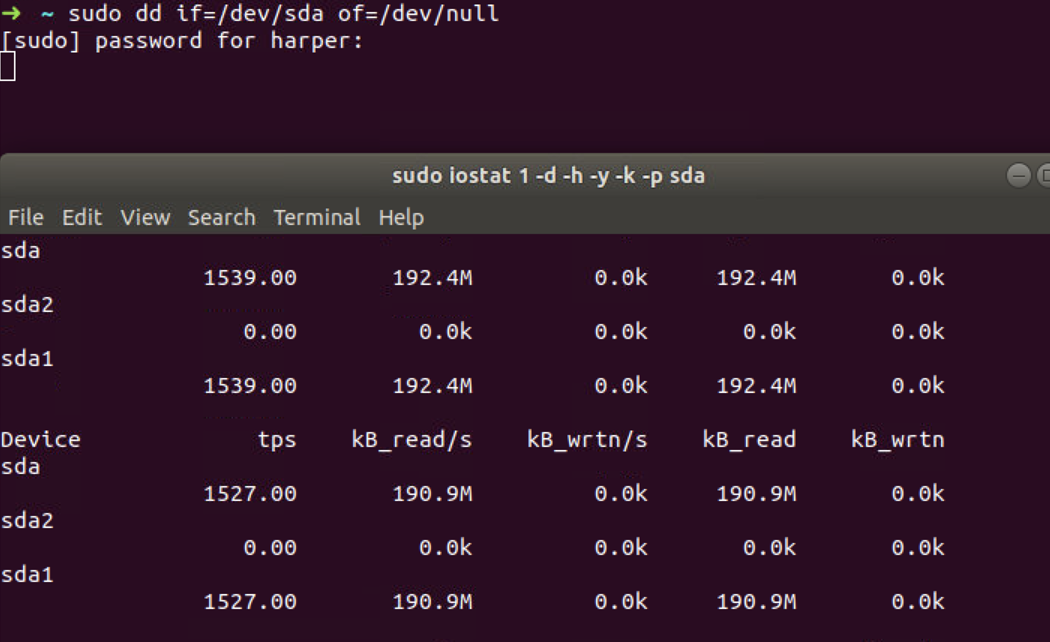
So let's start to limit I/O with cgroups v1. For I/O read, cgroups works, shown as follow.
1 | # 消耗io |
Before configuration, we can use iostat to check the I/O read that is
close to 200M/s.
To limit the I/O read, we need to create a cgroup test
in the blkio controller. Then we are going to set our read
limit using blkio.throttle.read_bps_device file. This
requires us to specify limits by device, so we must find out our device
major and minor version:

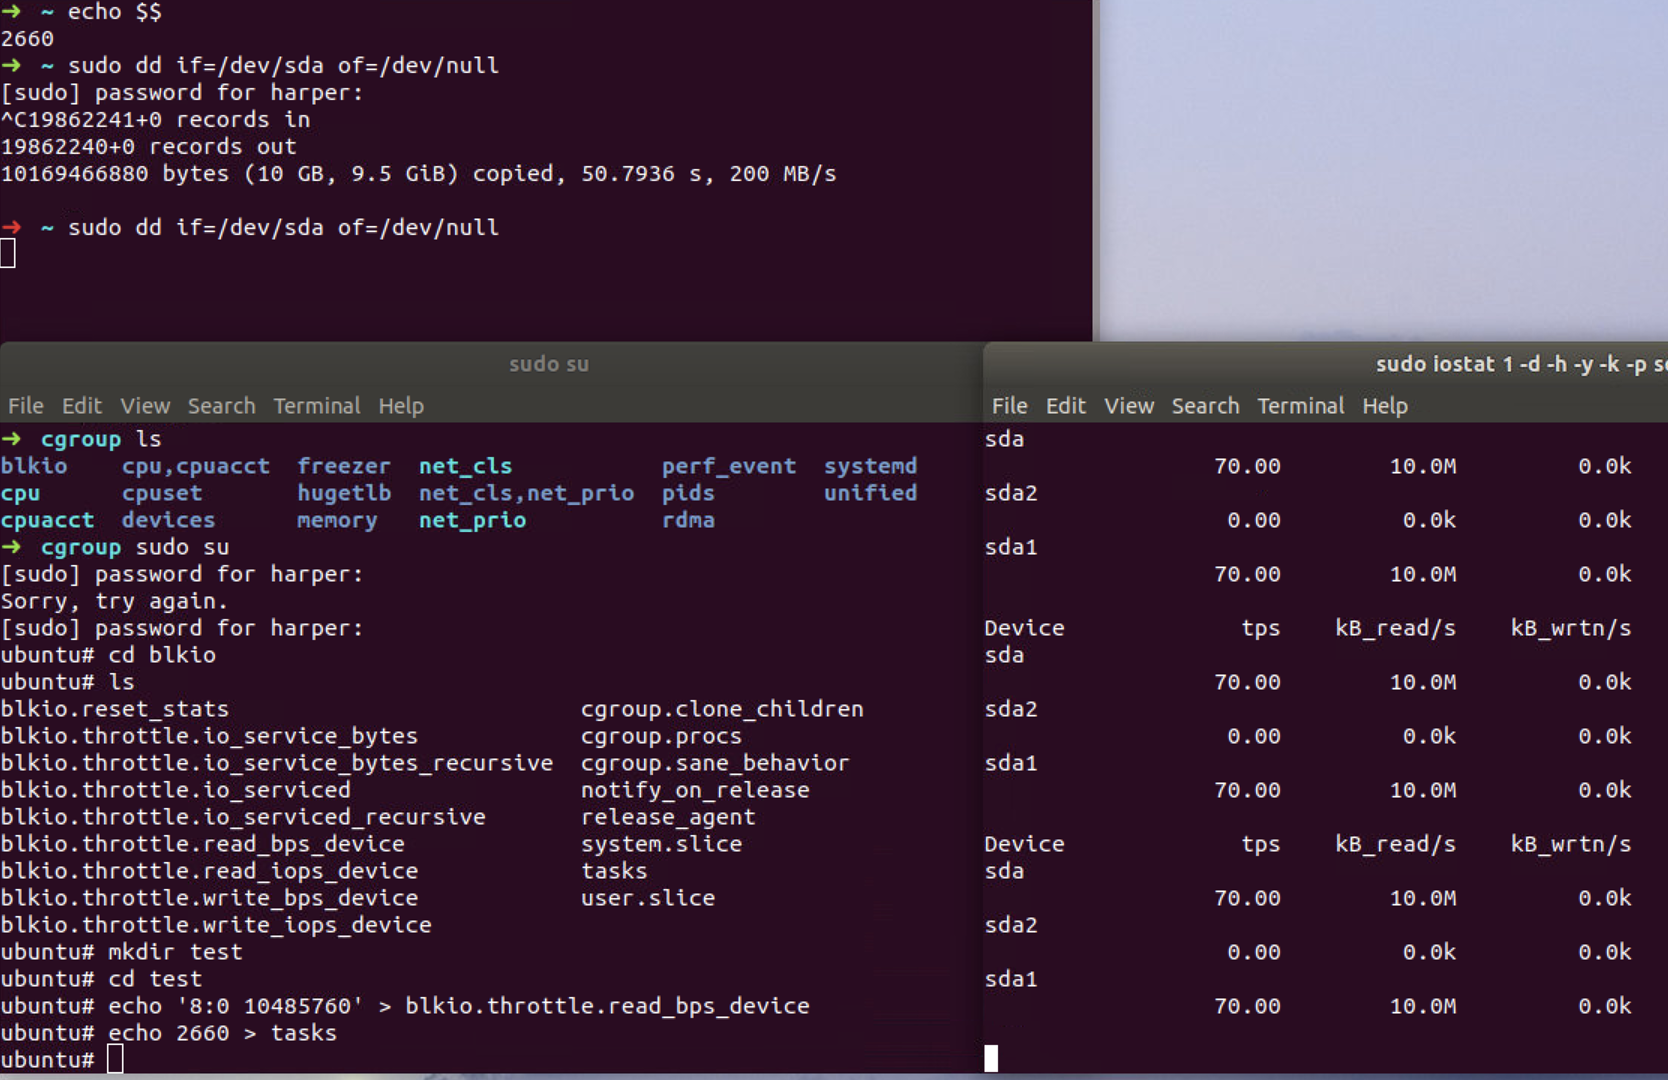
Let's limit the read bytes per second to 10485760 (10M/s) on the sda device (8: 0).
1 | ls /sys/fs/cgroup/blkio/ |
Then we place the shell into cgroup test by writing its pid 2660 into
tasks file and re-run the workload. The command we start in
this shell will run in this cgroup, so the read bytes per second now
become around 10M/s when watching the I/O workload using iostat.
For I/O write, this is not the case. We use the following command to generate I/O workload and monitor the I/O usage. The write bytes per second on the nvme0n1 device now is close to 150M/s.
1 | dd if=/dev/zero of=/tmp/file1 |
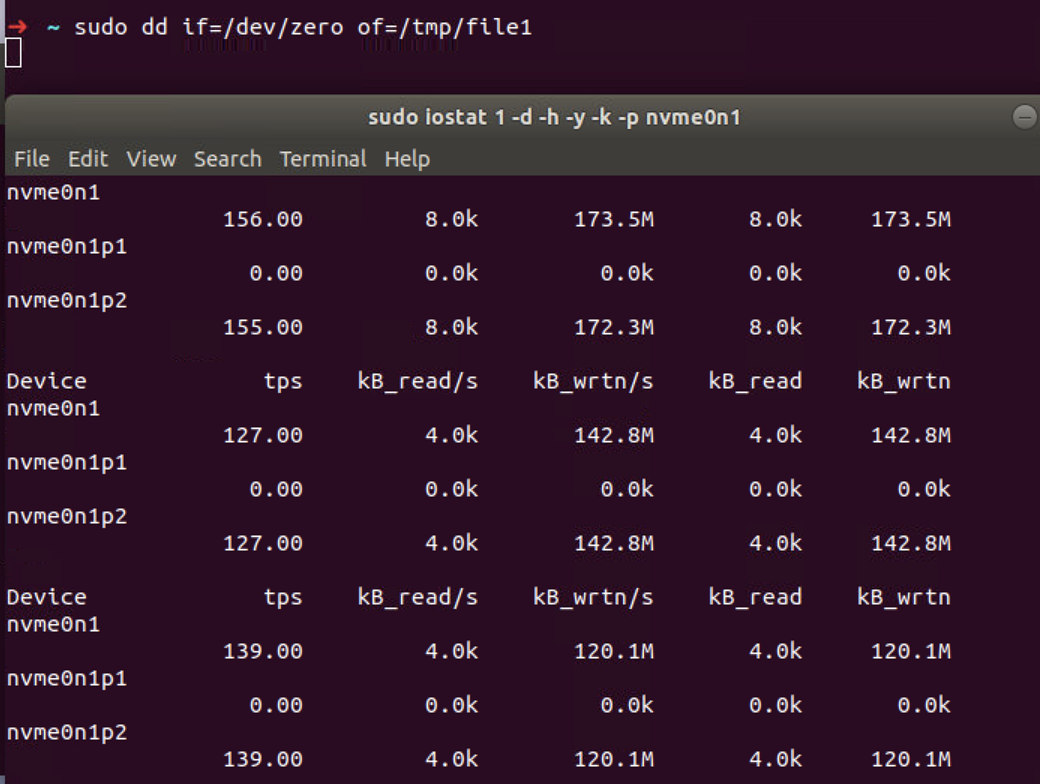
Then we limit the I/O usage using
blkio.throttle.write_bps_device file, now the device major
and minor version is 292: 0.
1 | echo '292:0 10485760' > blkio.throttle.write_bps_device |
However, we are still able to write 128 MB/s, so the limitation
doesn't work.
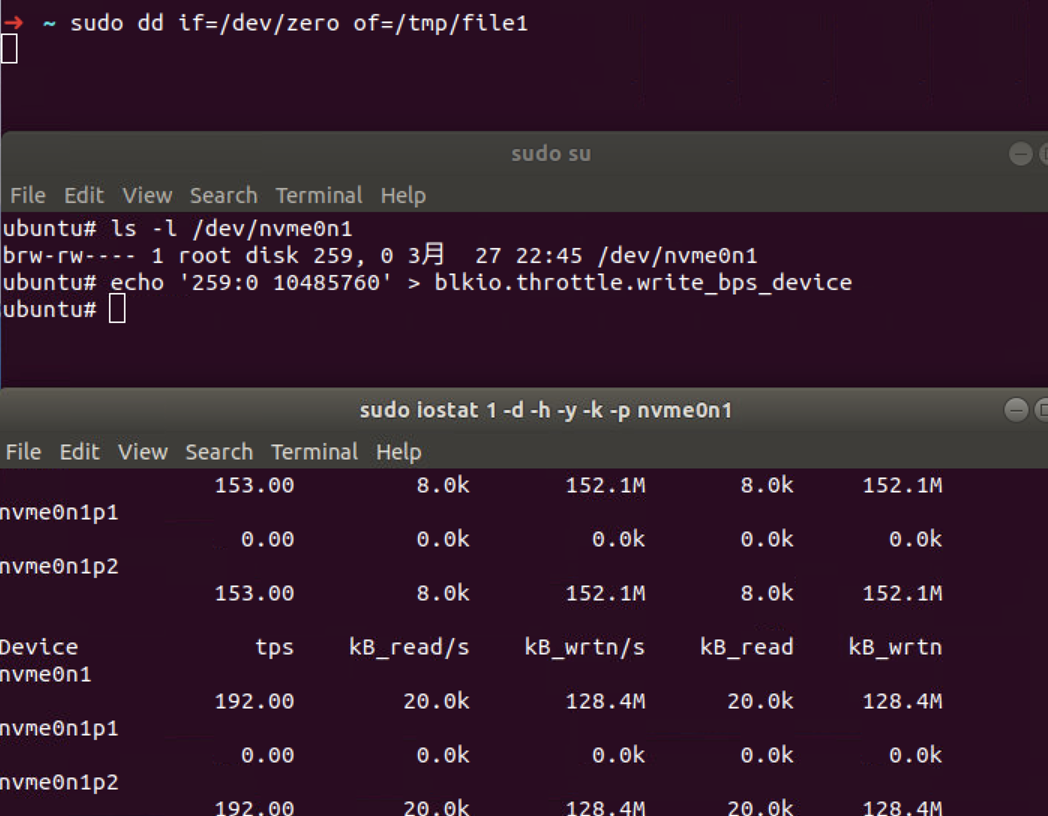
If we try the same command but opening the file with
O_DIRECT flag (passing oflag=direct to
dd), the write bytes per second now is around 10M/s.
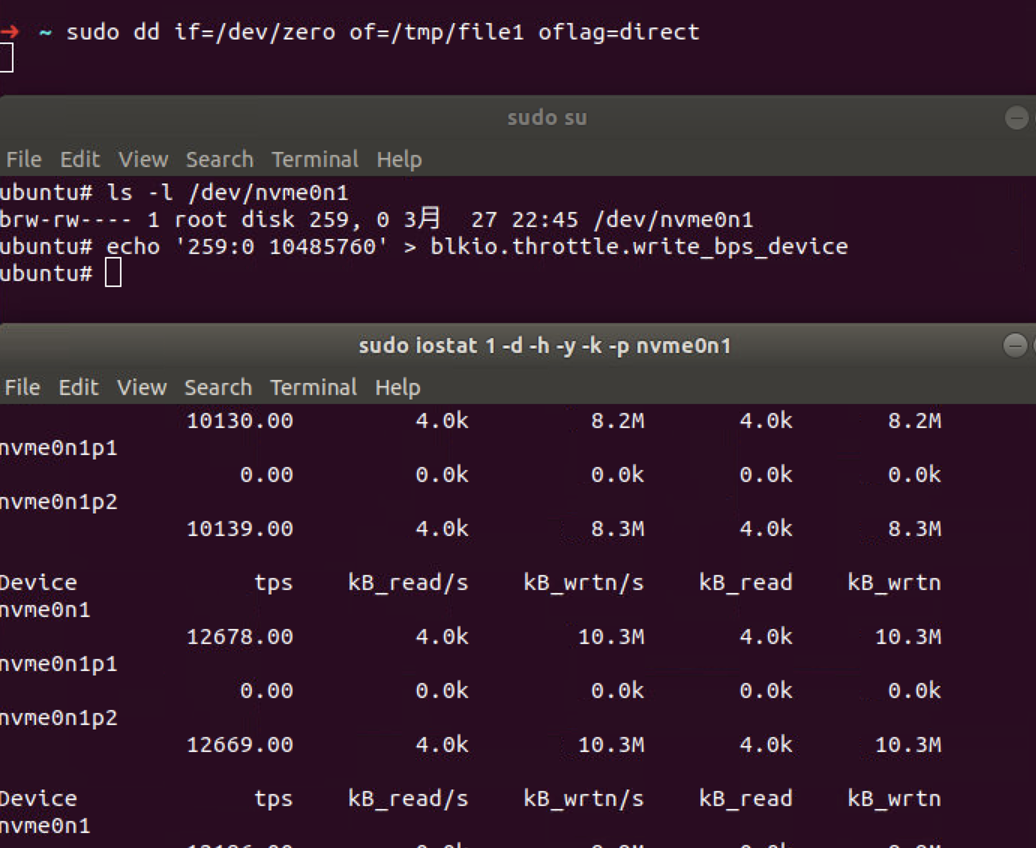
Basically, when we write to a file (opened without any special flags), the data travels across a bunch of buffers and caches before it is effectively written to the disk. Opening a file with O_DIRECT (available since Linux 2.4.10), means file I/O is done directly to/from user-space buffers.
On traditional cgroup hierarchies, relationships between different controllers cannot be established making it impossible for writeback to operate accounting for cgroup resource restrictions and all writeback IOs are attributed to the root cgroup.
It’s important to notice that this was added when cgroups v2 were already a reality (but still experimental). So the “traditional cgroup hierarchies” means cgroups v1. Since in cgroups v1, different resources/controllers (memory, blkio) live in different hierarchies on the filesystem, even when those cgroups have the same name, they are completely independent. So, when the memory page is finally being flushed to disk, there is no way that the memory controller can know what blkio cgroup wrote that page. That means it is going to use the root cgroup for the blkio controller.
6.2 CGroupv2
https://www.kernel.org/doc/Documentation/cgroup-v2.txt
We need add the following to /etc/default/grub and
update.
1 | GRUB_CMDLINE_LINUX_DEFAULT="cgroup_no_v1=all" |
Also, we need delete /etc/init/cgroup-lite.conf and
reboot to unmount and disable cgroup v1.
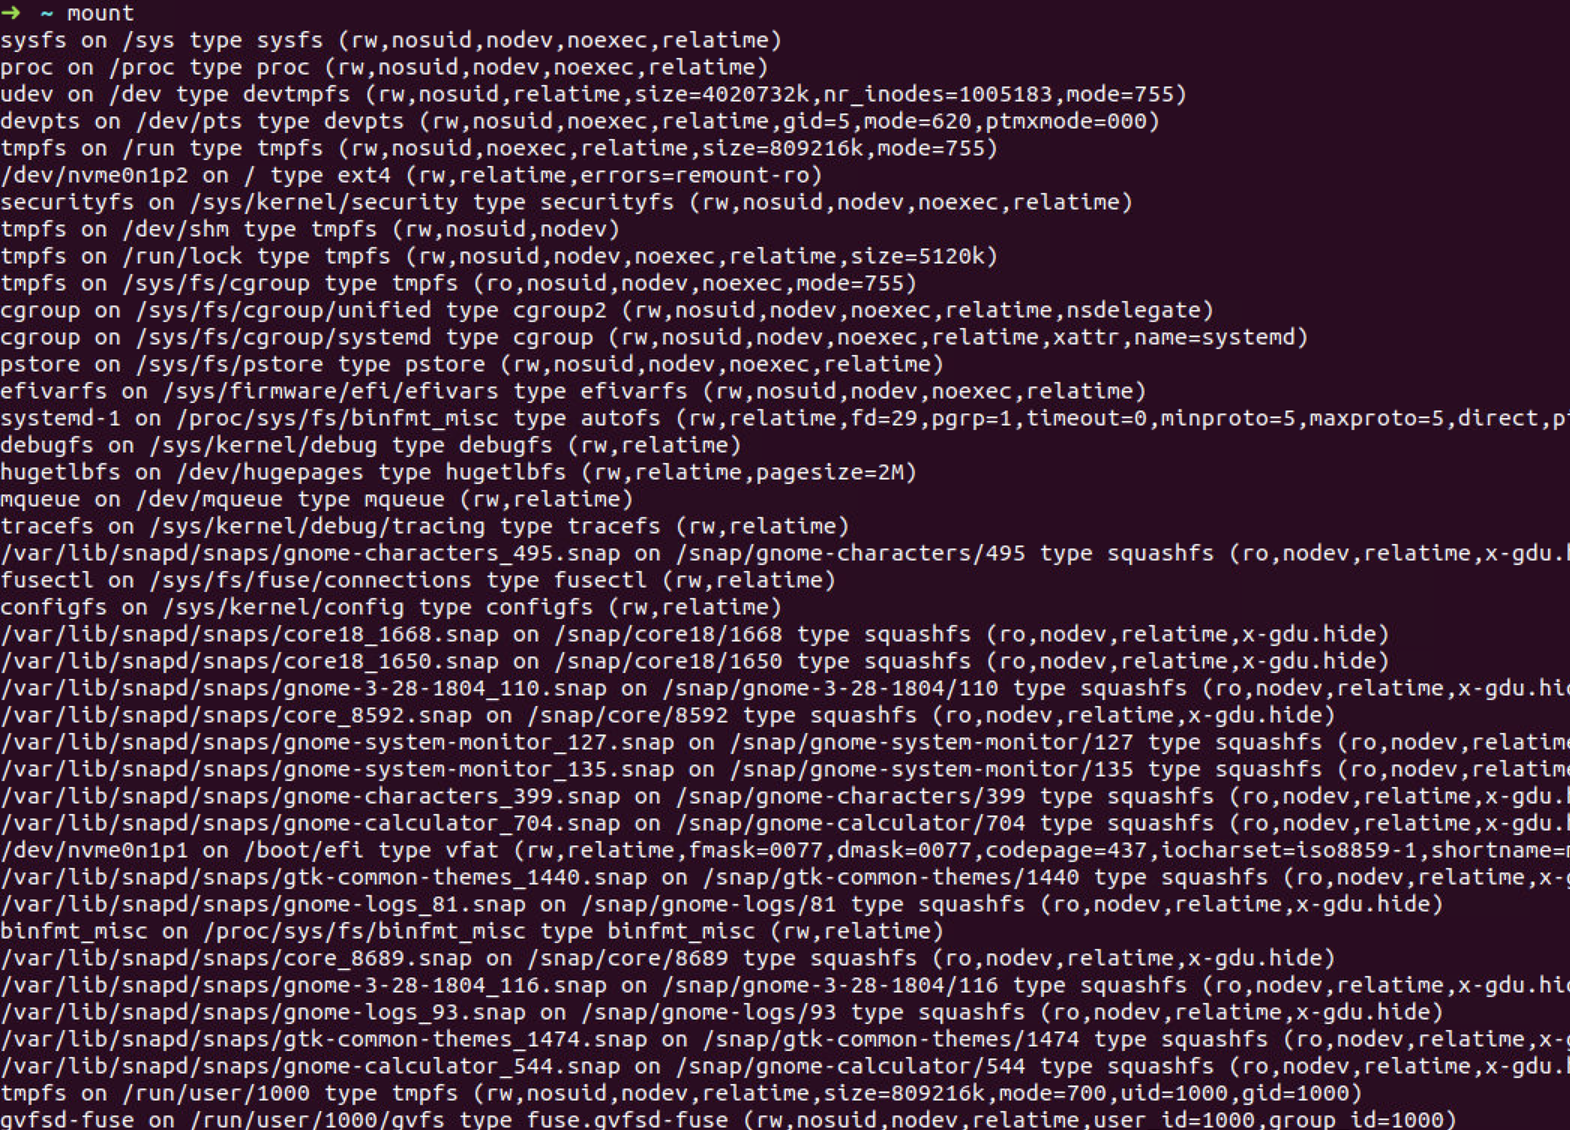
First, we mount cgroup v2 filesystem in /mnt/cgroup2
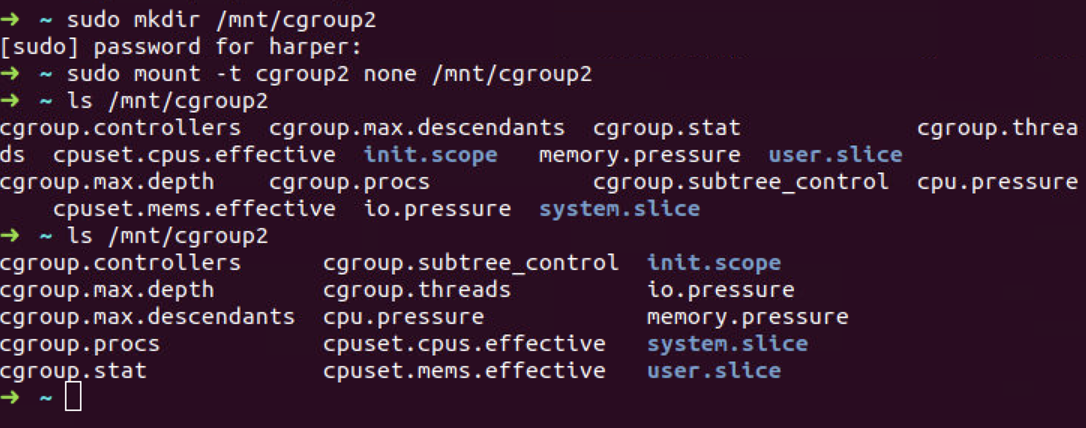
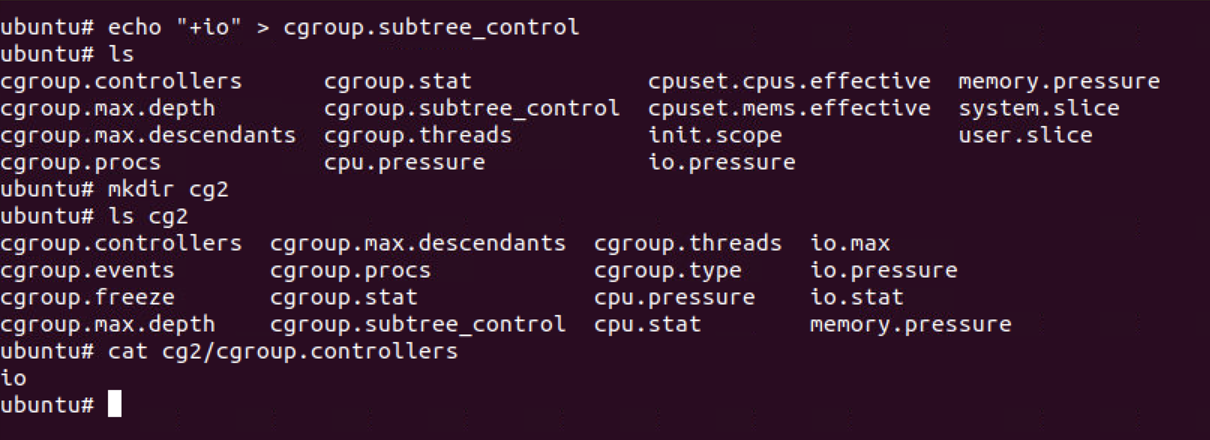
Now, we create a new cgroup called cg2 by creating a directory under
the mounted file system. To be able to edit the I/O limits using the the
I/O controller on the newly created cgroup, we need to write “+io” to
the cgroup.subtree_control file in the parent (in this
case, root) cgroup, and check the cgroup.controllers file
for the cg2 cgroup, we see that the io controller is enabled.
To limit I/O to 10MB/s, as done previously, we write into the io.max
file and use dd to generate some IO workload.
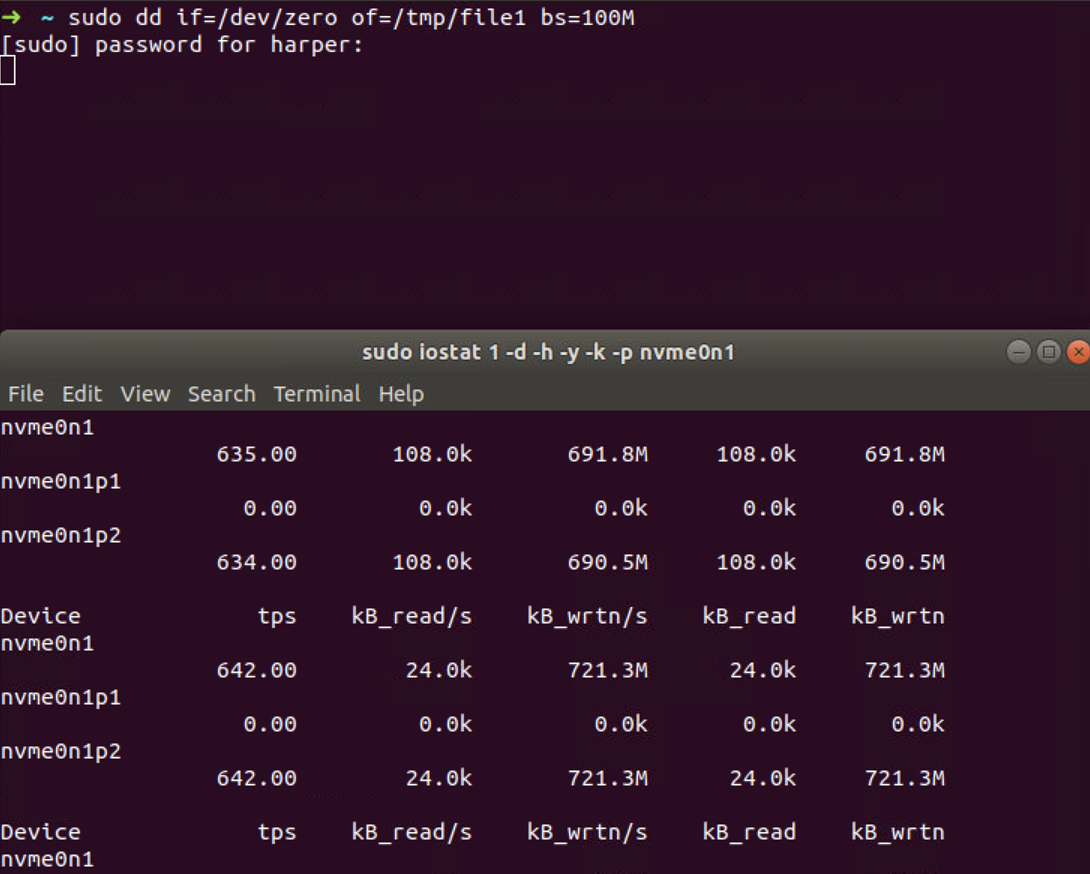
The write bytes per second is around 700M/s. Let’s add our bash
session to the cg2 cgroup, by writing its PID to
cgroup.procs file. At the same time, we get this output
from iostat (redacted).
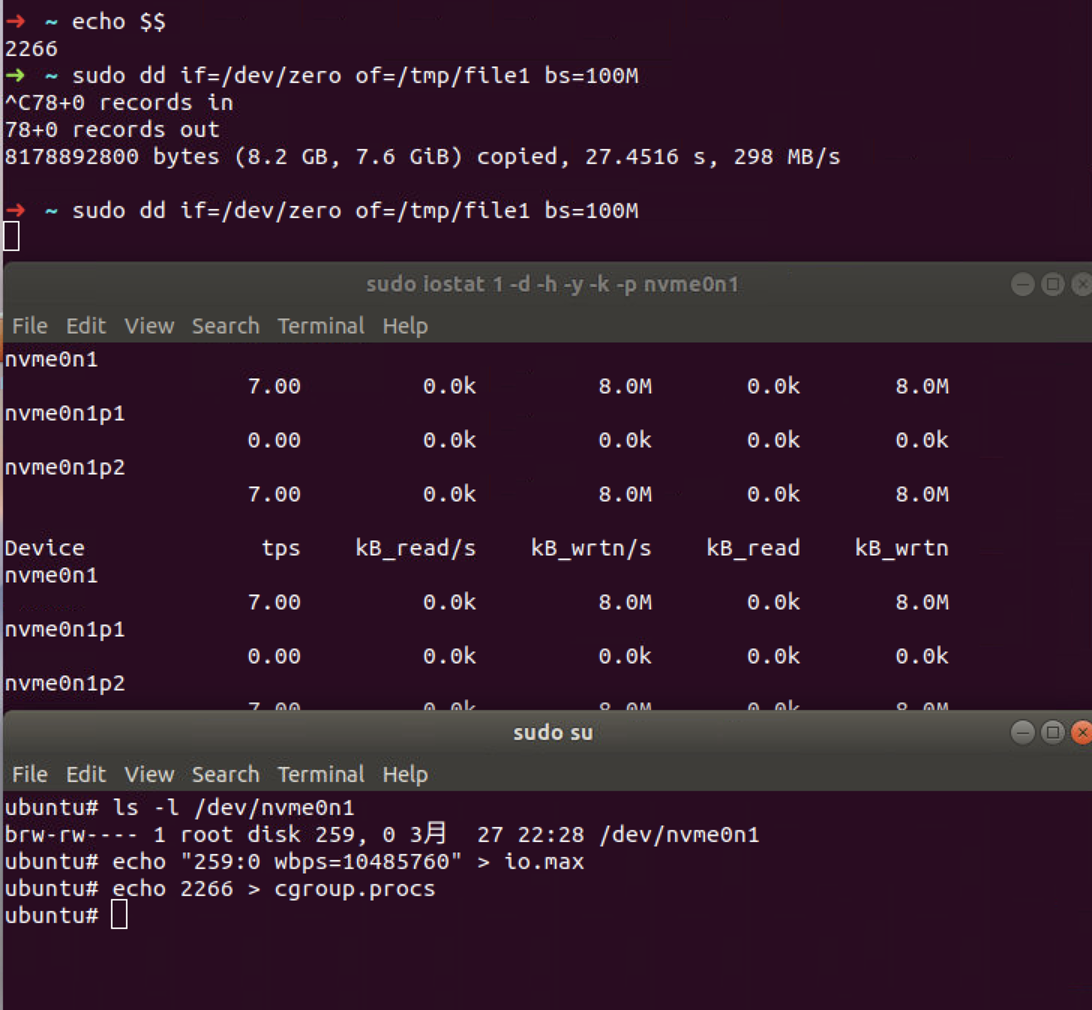
So, even relying on the writeback kernel cache we are able to limit the I/O on the disk with cgroup v2.